How To Send A P2P Transfer To Another Account-Holder
With your verified Paxum account you have the ability to send money anywhere in the world with just an email address.
All sent payments are instantly received and available for use to the person you paid.
Sending an instant P2P (peer-to-peer) payment with Paxum is very straightforward, you’re going to love how easy sending money worldwide can be with Paxum!
First you’ll need to login to your verified Paxum Account
After you login, you’ll need to click TRANSFER FUNDS from the top menu bar. This will load a page that displays two options; TRANSFER BETWEEN ACCOUNTS and TRANSFER TO ANOTHER ACCOUNT-HOLDER.
From this page you will want to click TRANSFER TO ANOTHER ACCOUNT-HOLDER:

A new page will load with various fields to complete in order to initiate the funds transfer. We’ve explained each field below:
- From Email
>Select the email address you wish to use to send money from the dropdown. This is the email address that the person you send funds to will see displayed as the sender of the payment. - From
>Select the Paxum Checking Account you wish to send the money from. If you have enabled Multiple Currency accounts for your Paxum Account these options will display in this field. (Click here to learn how to add Multiple Currencies to your account) - To Email
>Input the email address of the person you wish to send money to. You can also add those email addresses to your Beneficiary List if desired. The Beneficiary List is a saved list of email addresses you regularly send money to. It provides convenience and saves you time since, once added to the list, the email address will auto-fill when you type it, or be available to easily select from the list. - Amount
>Type the digit number of how much you wish to send. Make sure the currency denomination to the right of the box matches the currency you wish to send. By default it will be USD unless you select an alternative currency checking account in the FROM field. - Type
>The dropdown menu provides several options to choose from to describe the type of payment you are sending. The options are: Auction Goods; Goods (Other); Auction Services; Services (Other); and Quasi Cash. Quasi Cash is selected by default and is indicative of a cash payment. Make the appropriate selection from the dropdown menu. - Reference # (Optional)
>If you use references to monitor your own payments internally, then you can input the reference number here that you wish to be associated with the payment. - Transfer Frequency
>If you wish to arrange for this payment to recur you can set the transfer frequency in this field. The dropdown offers the following options; Once, Every Week, Every Two Weeks, Every Month, Every Three Months, Every Six Months, Annually. - Note: (optional)
>When your payment is sent you can opt to have a note included that the person you are paying will receive. You can enter any note you wish in this field, or leave it blank if you prefer. - Coupon (optional)
>If you have received a coupon from Paxum associated with P2P transfers to another account-holder, then this is the field where you should enter that coupon.
After you have entered the information click the blue CONTINUE button:

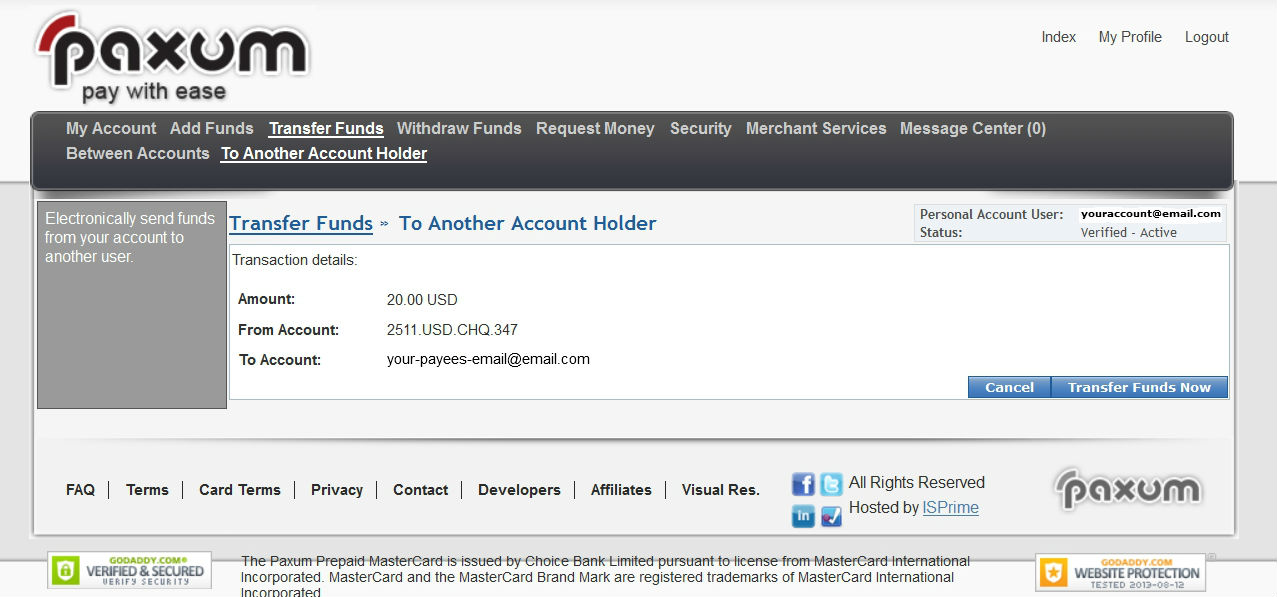
After you have completed all the necessary fields and clicked CONTINUE you will be taken to a confirmation page to review the payment you are about to send. Make sure the information is correct and then click the blue TRANSFER FUNDS NOW button to finalize and send the payment.
This last step is crucial. If you do not click TRANSFER FUNDS NOW then the transaction will NOT finalize and the payment will NOT be sent!


